Apply Loan Event Flow
The second menu item of the BrokerMenu is Apply Loan.
Brokers can click on this menu item and navigate to Loan Request page and apply for a loan on behalf of a Broker.
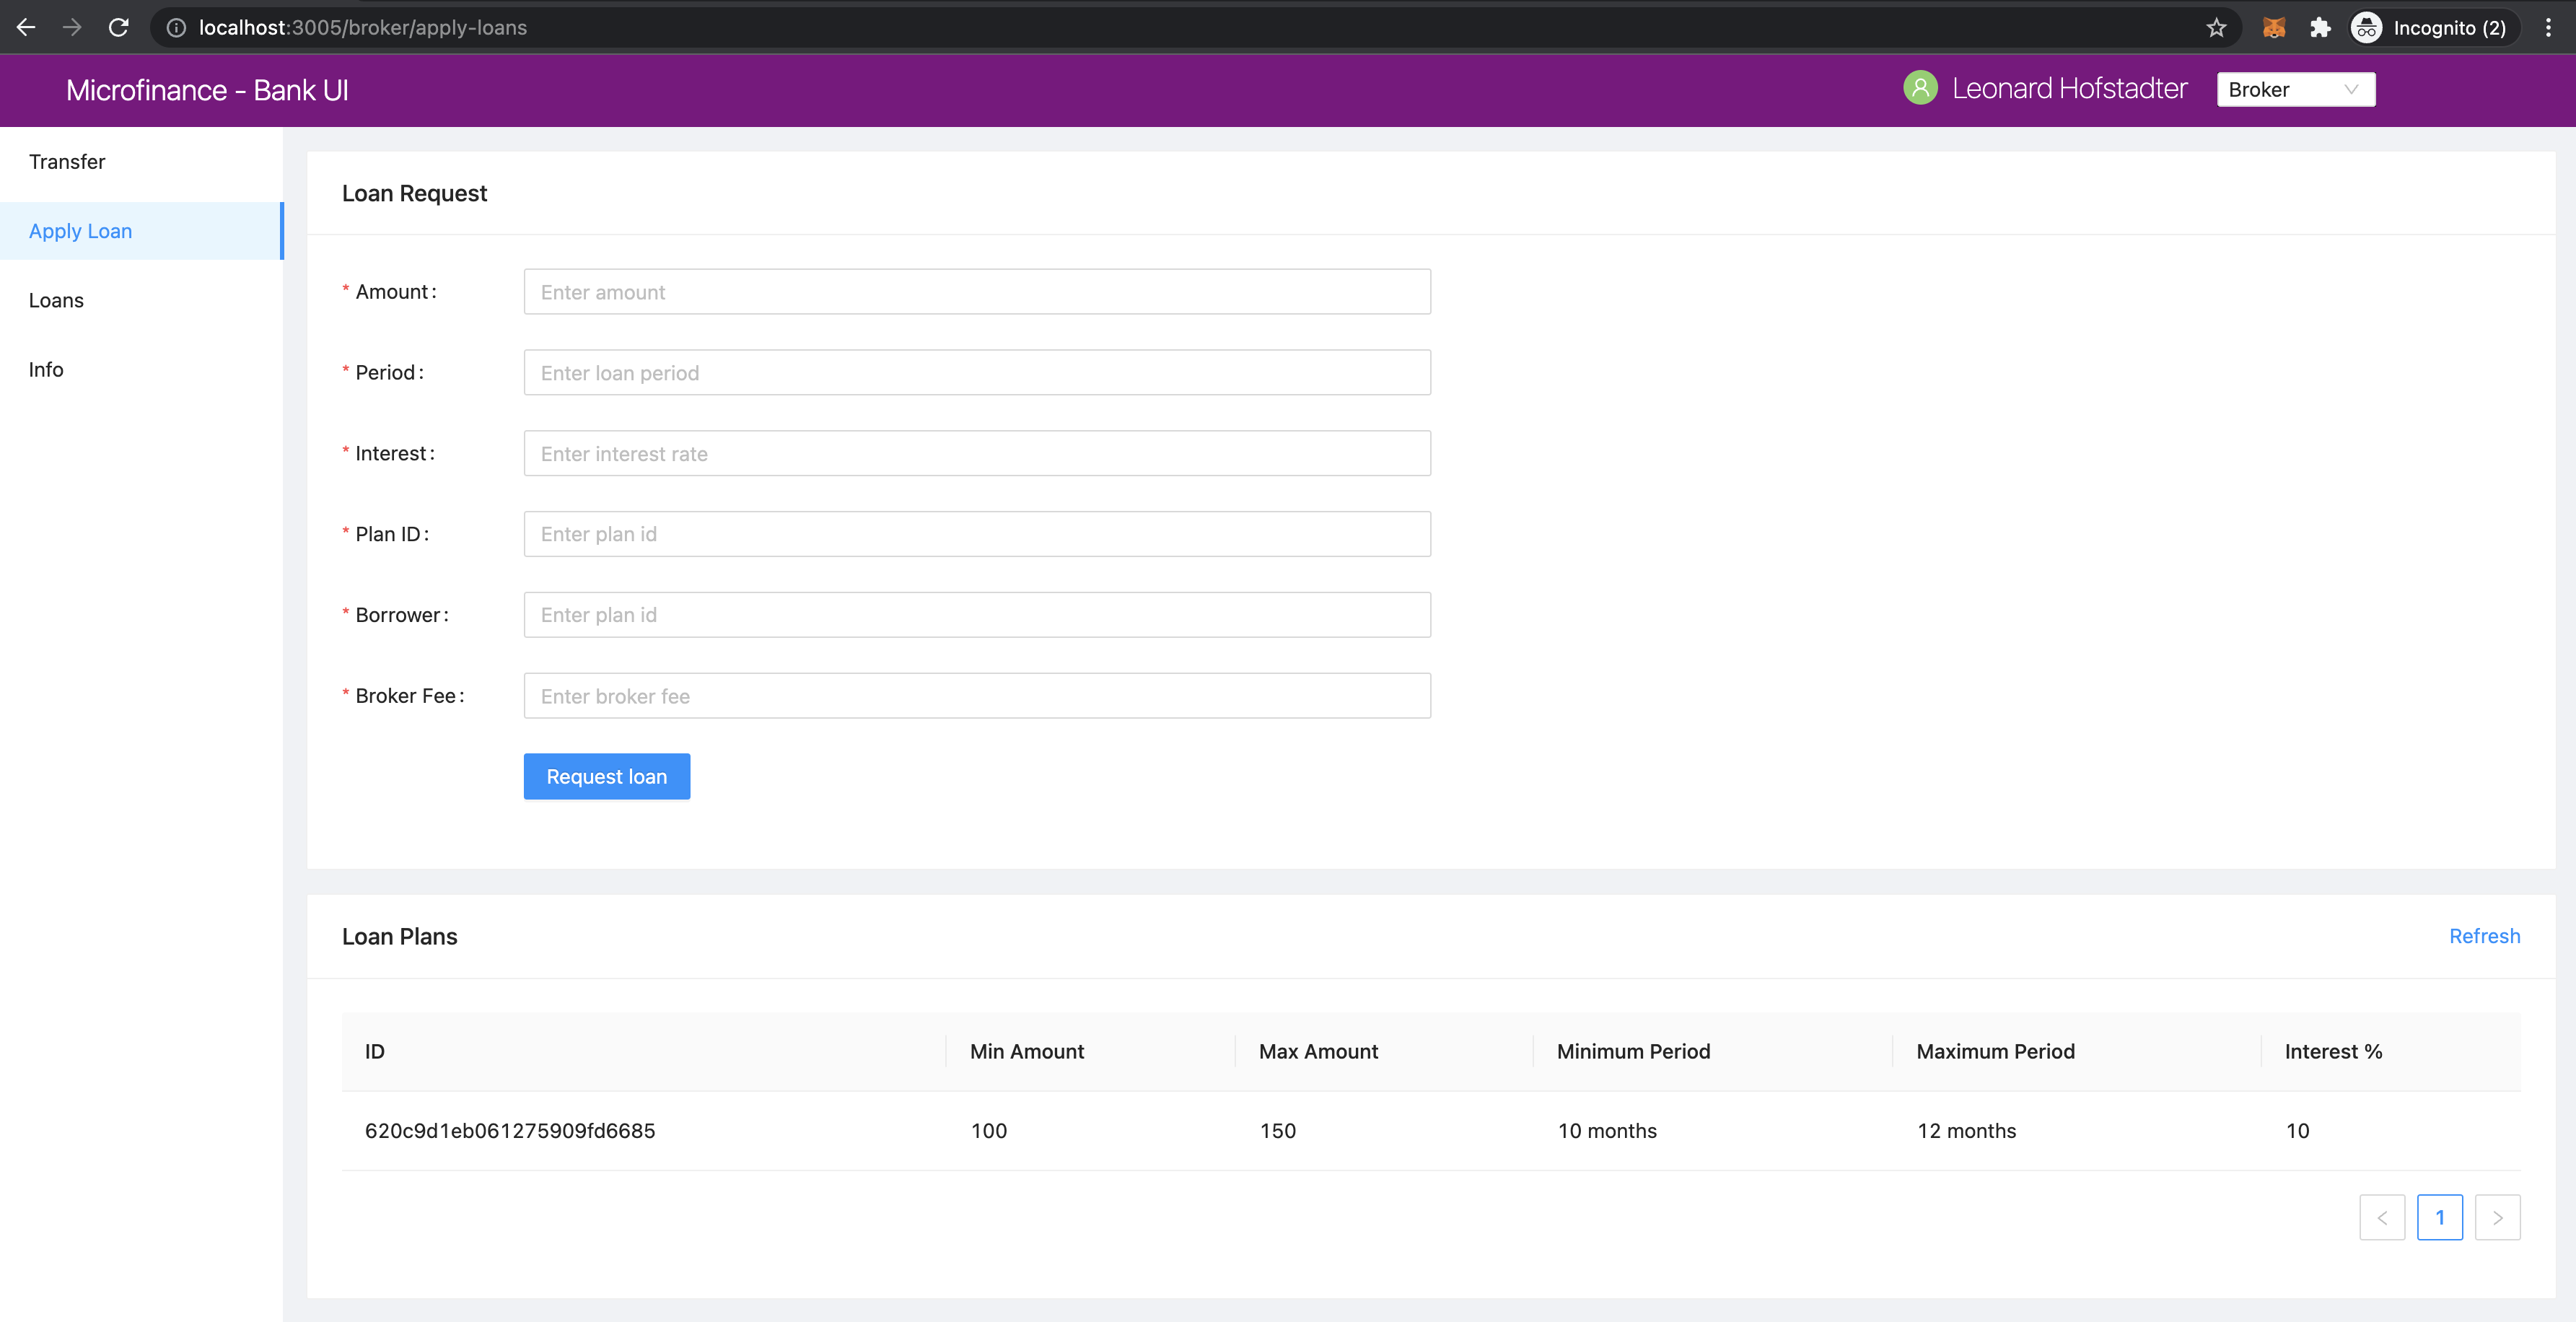
As you can see in the address bar of above screenshot it loads the page in /pages/broker/apply-loans.js.
We illustrate the flow of events from React web app (UI) to
bank-web-app/pages/broker/apply-loans.js to bank-web-app/components/loan/LoanForm.js.
apply-loans.js
The script of the apply-loans.js.
import React from 'react';
import { Row, Col } from 'antd';
import LoanForm from '../../components/loan/LoanForm';
import PlansTable from '../../components/plan/PlansTable';

function ApplyLoans() {
    return (
        <>
            <Row gutter={[16, 16]}>
                <Col span={24}>
                    <LoanForm />
                </Col>
                <Col span={24}>
                    <PlansTable />
                </Col>
            </Row>
        </>
    );
}

export default ApplyLoans;
In this apply-loans.js script, it first imports the dependencies.
Then it defines the ApplyLoans() function.
In this React Component it load the <LoanForm /> and <PlansTable /> React Components.
<Row> and <Col> Ant design components help to arrange These React component in the browser.
As you can see in above screenshot first it diplays the Loan Request form and later Loan Plans table.
The LoanForm imported from the ../../components//loan/LoanForm.
Next we discuss about important code snippets of the LoanForm.js script.
LoanForm.js
In the top of the LoanForm.js it imports following dependencies.
import React, { useContext } from 'react';
import { Card, Form, InputNumber, Input, Button, message } from 'antd';
import SmartContractContext from '../../stores/smartContractContext';
it imports SmartContractContext to use some smart contracts related context objects.
LoanForm.js returns the following html form.
return (
  <Card title="Loan Request Form">
    <Form
      ...
      onFinish={createLoanRequest}
    >
      <Form.Item label="Amount" name="amount" rules={[{ required: true, message: 'Please enter amount!' }]}>
        <InputNumber
          min="0"
          style={{ width: '100%' }}
          placeholder="Enter amount"
        />
      </Form.Item>
      <Form.Item label="Period" name="period" rules={[{ required: true, message: 'Please enter period!' }]}>
        <InputNumber
          min="0"
          style={{ width: '100%' }}
          placeholder="Enter loan period"
        />
      </Form.Item>
      <Form.Item label="Interest" name="interest" rules={[{ required: true, message: 'Please enter interest!' }]}>
        <InputNumber
          min="0"
          style={{ width: '100%' }}
          placeholder="Enter interest rate"
        />
      </Form.Item>
      <Form.Item label="Plan ID" name="planId" rules={[{ required: true, message: 'Please enter plan id!' }]}>
        <Input
          placeholder="Enter plan id"
        />
      </Form.Item>
      <Form.Item label="Borrower" name="borrower" rules={[{ required: true, message: 'Please enter borrower!' }]}>
        <Input
          min="0"
          style={{ width: '100%' }}
          placeholder="Enter plan id"
        />
      </Form.Item>
      <Form.Item label="Broker Fee" name="brokerFee" rules={[{ required: true, message: 'Please enter Broker Fee!' }]}>
        <InputNumber
          min="0"
          style={{ width: '100%' }}
          placeholder="Enter broker fee"
        />
      </Form.Item>
      <Form.Item wrapperCol={{
        lg: { span: 14, offset: 3 },
        xl: { span: 14, offset: 2 },
        xxl: { span: 14, offset: 2 } }}
      >
        {/* Form submit button */}
        <Button type="primary" htmlType="submit">Request Loan</Button>
      </Form.Item>
    </Form>
  </Card>
);
First it defines a Card``Ant design component with ``Loan Request as the title.
Then it defines the Form component. In for it has a propert onFinish={createLoanRequest}.
This will call the createLoanRequest when user submits the form with values object.
This values object contains the form field values.
These values can be accessed using their names in createLoanRequest function.
We will discuss more about createLoanRequest function later.
Then it defines the Form.Item components.
It has Form.Item for each field of the form.
All these Form.Item have label and name attributes.
label attribut will display before the input area and name propert will use in the createLoanRequest
function to get the submitted form field value by user.
Input and InputNumber components defines the type of the input accept by the form field.
Finally it defines the Form.Item with the Button component to submit the form.
When user click the submit button first it will check all the required fields have values and then call the createLoanRequest
with values object which contains the form fields values.
In LoanForm component it access the BankLoanContract smart contract object as follows.
const { BankLoanContract } = useContext(SmartContractContext);
Then it defines the createLoanRequest function we discuss before to submit the loan request to the
BankLoan smart contract.
const createLoanRequest = async (values) => {
        try {
                const accounts = await window.ethereum.request({ method: 'eth_requestAccounts' });

                await BankLoanContract.methods.applyLoan(
                        values.amount,
                        values.period,
                        values.interest,
                        values.planId,
                        values.borrower,
                        values.brokerFee,
                ).send({ from: accounts[0] });
                message.success('New loan requested successfully');
        } catch (err) {
                console.log(err);
                message.error('Error creating loan request');
        }
};
createLoanRequest is an asynchronous function.
It has the values parameter which contains the form fields values when user submits the form.
const accounts = await window.ethereum.request({ method: 'eth_requestAccounts' }); helps to get the selected account from the MetaMask browser plugin.
This function will return selected account as an array.
Then it will call the applyLoan method in the BankLoan smart contract using BankLoanContract smart contract context object.
values.amount will return the amout submitted from the form. Like values.amount all the form field values
passed through the values oject will pass to the applyLoan method as parameters.
Since applyLoan method will change the blockchain smart contract state we have to use send method to
call the applyLoan function.
send({ from: accounts[0] }) passes the MetaMask selected account as the smart contract methos caller.
If These functions executed successfully it will display the New loan requested successfully message in the
to of the UI. else it will displays Error creating loan request message.