Page Navigation with Menu Items
There are three different menus in the Microfinance - Bank UI web app, each corresponding to a user role.
These menus are defined in the bank-web-app/components/menu directory:
BankMenu.js- Menu for Bank users.BorrowerMenu.js- Menu for Borrowers.BrokerMenu.js- Menu for Brokers.
The UI layout is common for all user roles. There are three main areas in the app layout; Header, Left Panel and Main Content Area.
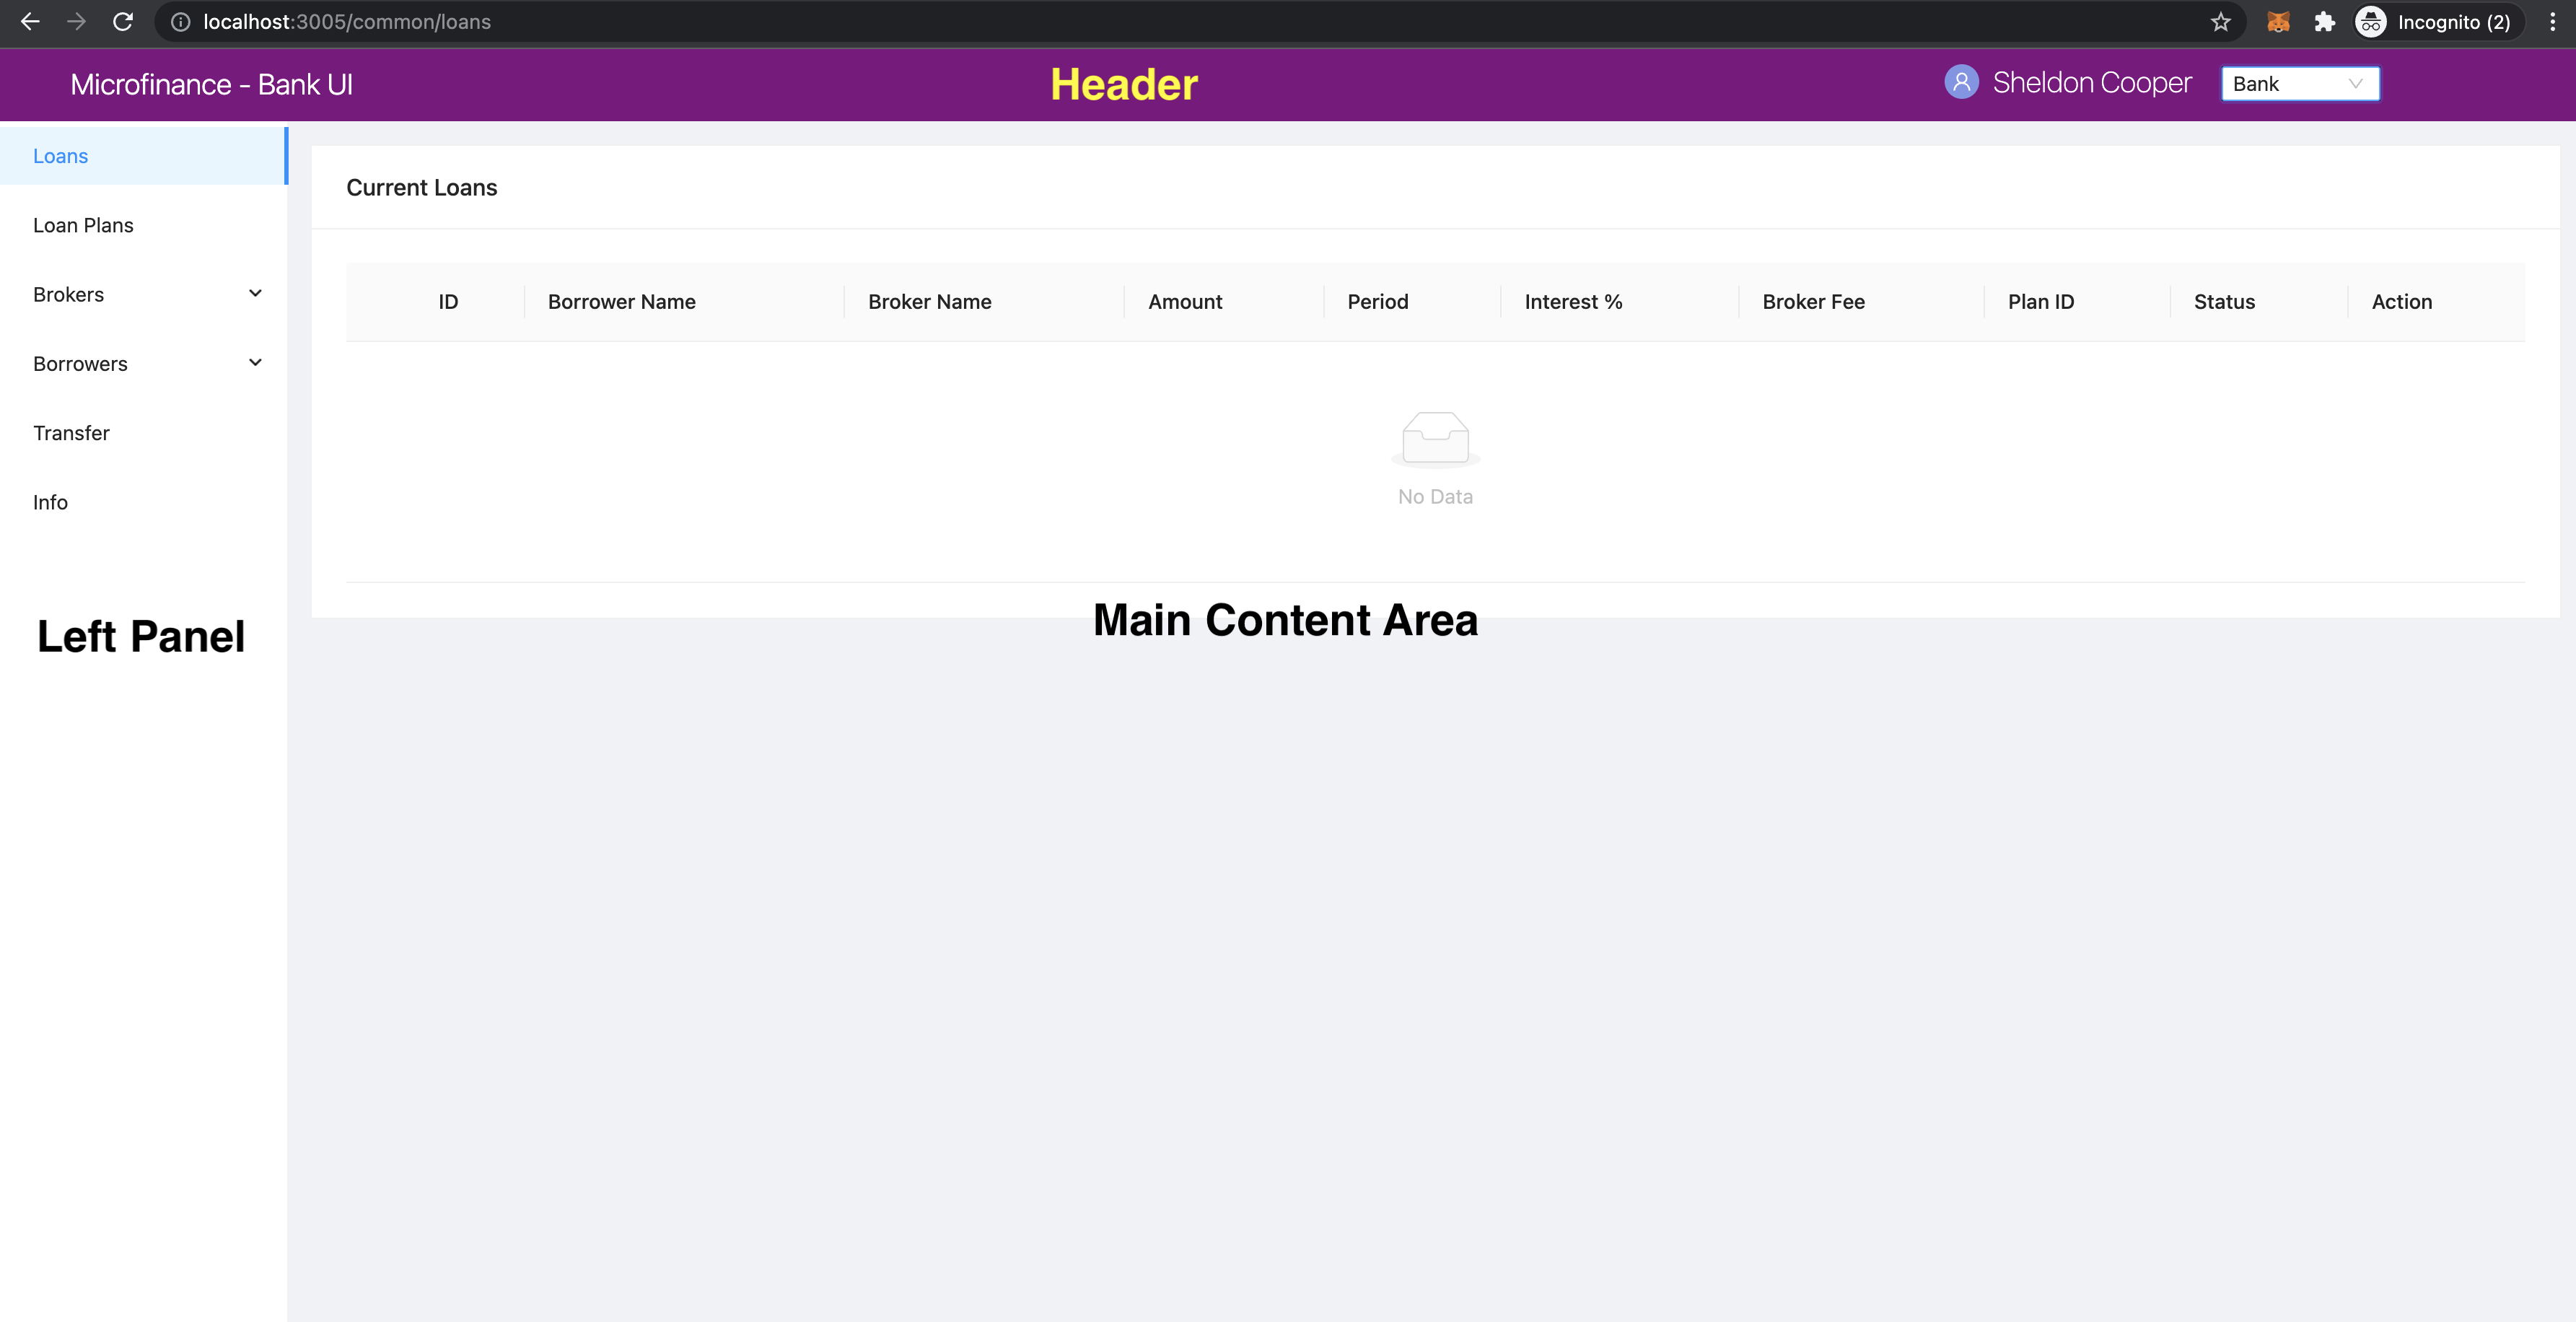
Header shows which user role is currently used.
Left Panel loads a menu according to the selected user role.
Main Content Area loads the scripts according to the selected menu item and renders the corresponding page on the right-side of the app. The content area is the major visual portion of the app.
Each menu loads pages from the bank-web-page/pages directory.
You can tell what is rendered on the main content area by looking at the address bar.
Refer to the following screenshot of the app.
Broker’s view:
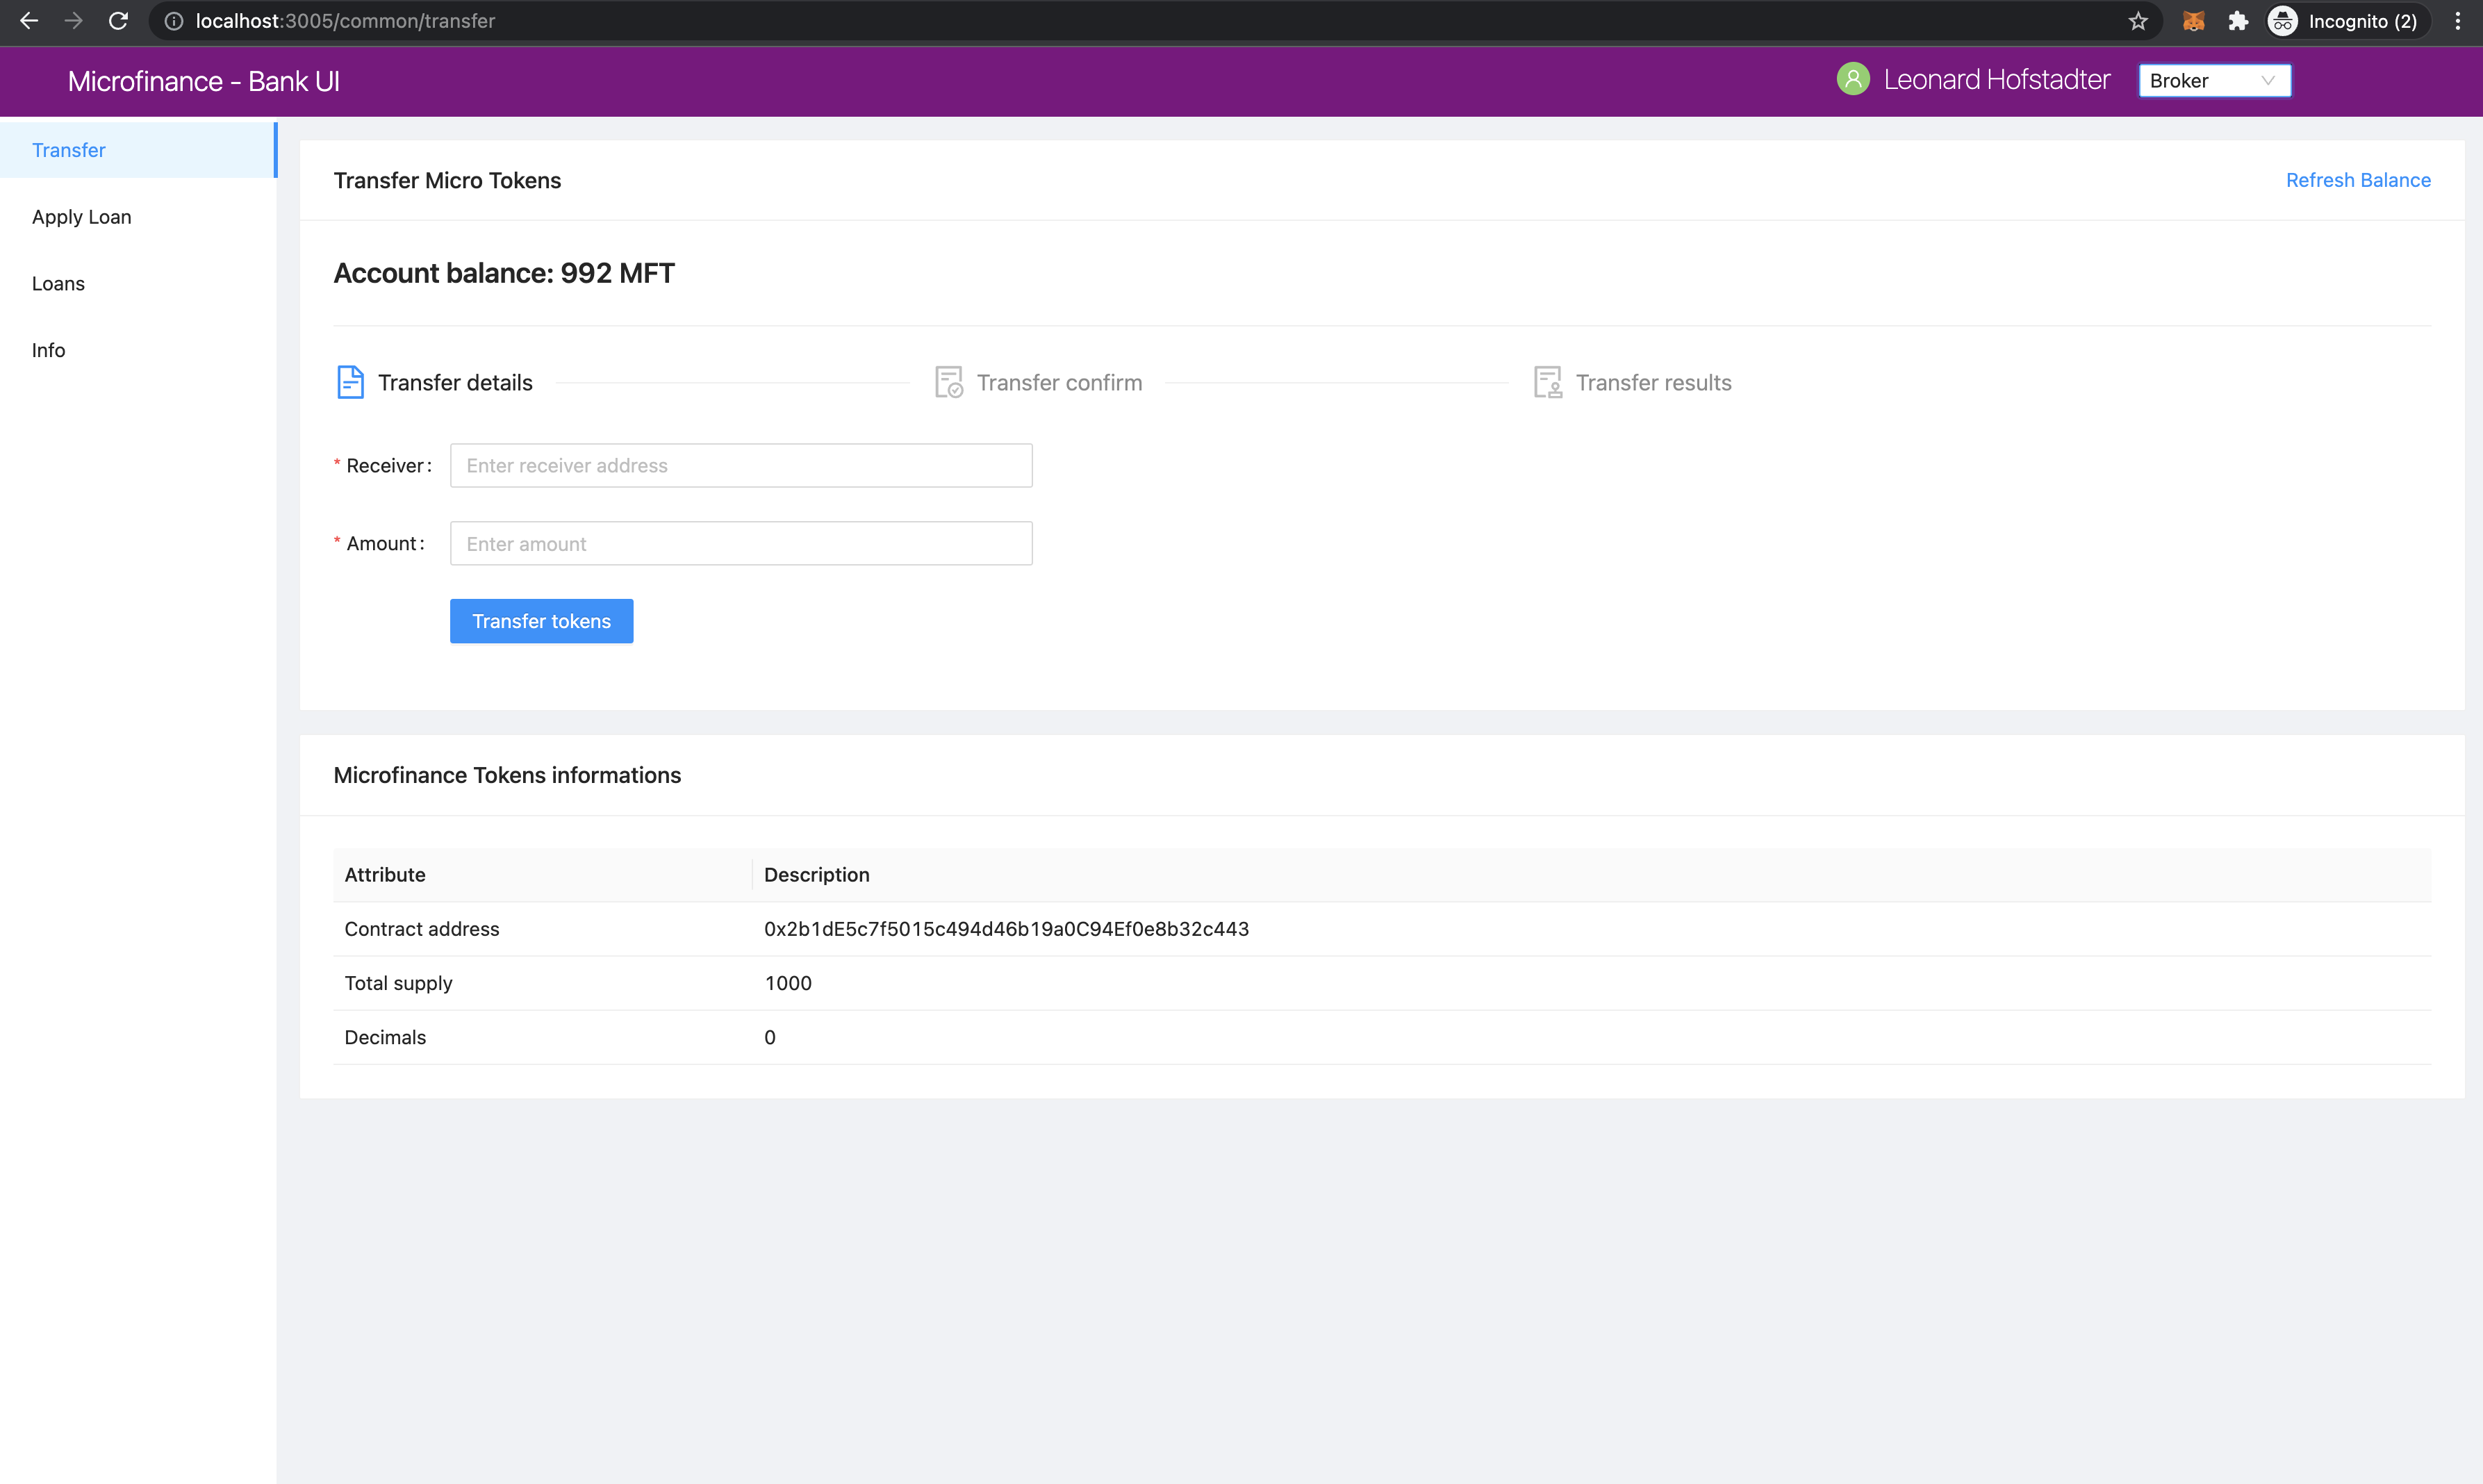
As you can see, the selected user role is Broker. The left panel has four menu items. The Transfer menu item has been selected.
The browser’s address bar shows localhost:3005/common/transfer.
This means the Transfer menu item has loaded the script in pages/common/transfer.js and the page on the right-side content area is rendered.
Borrower’s view:
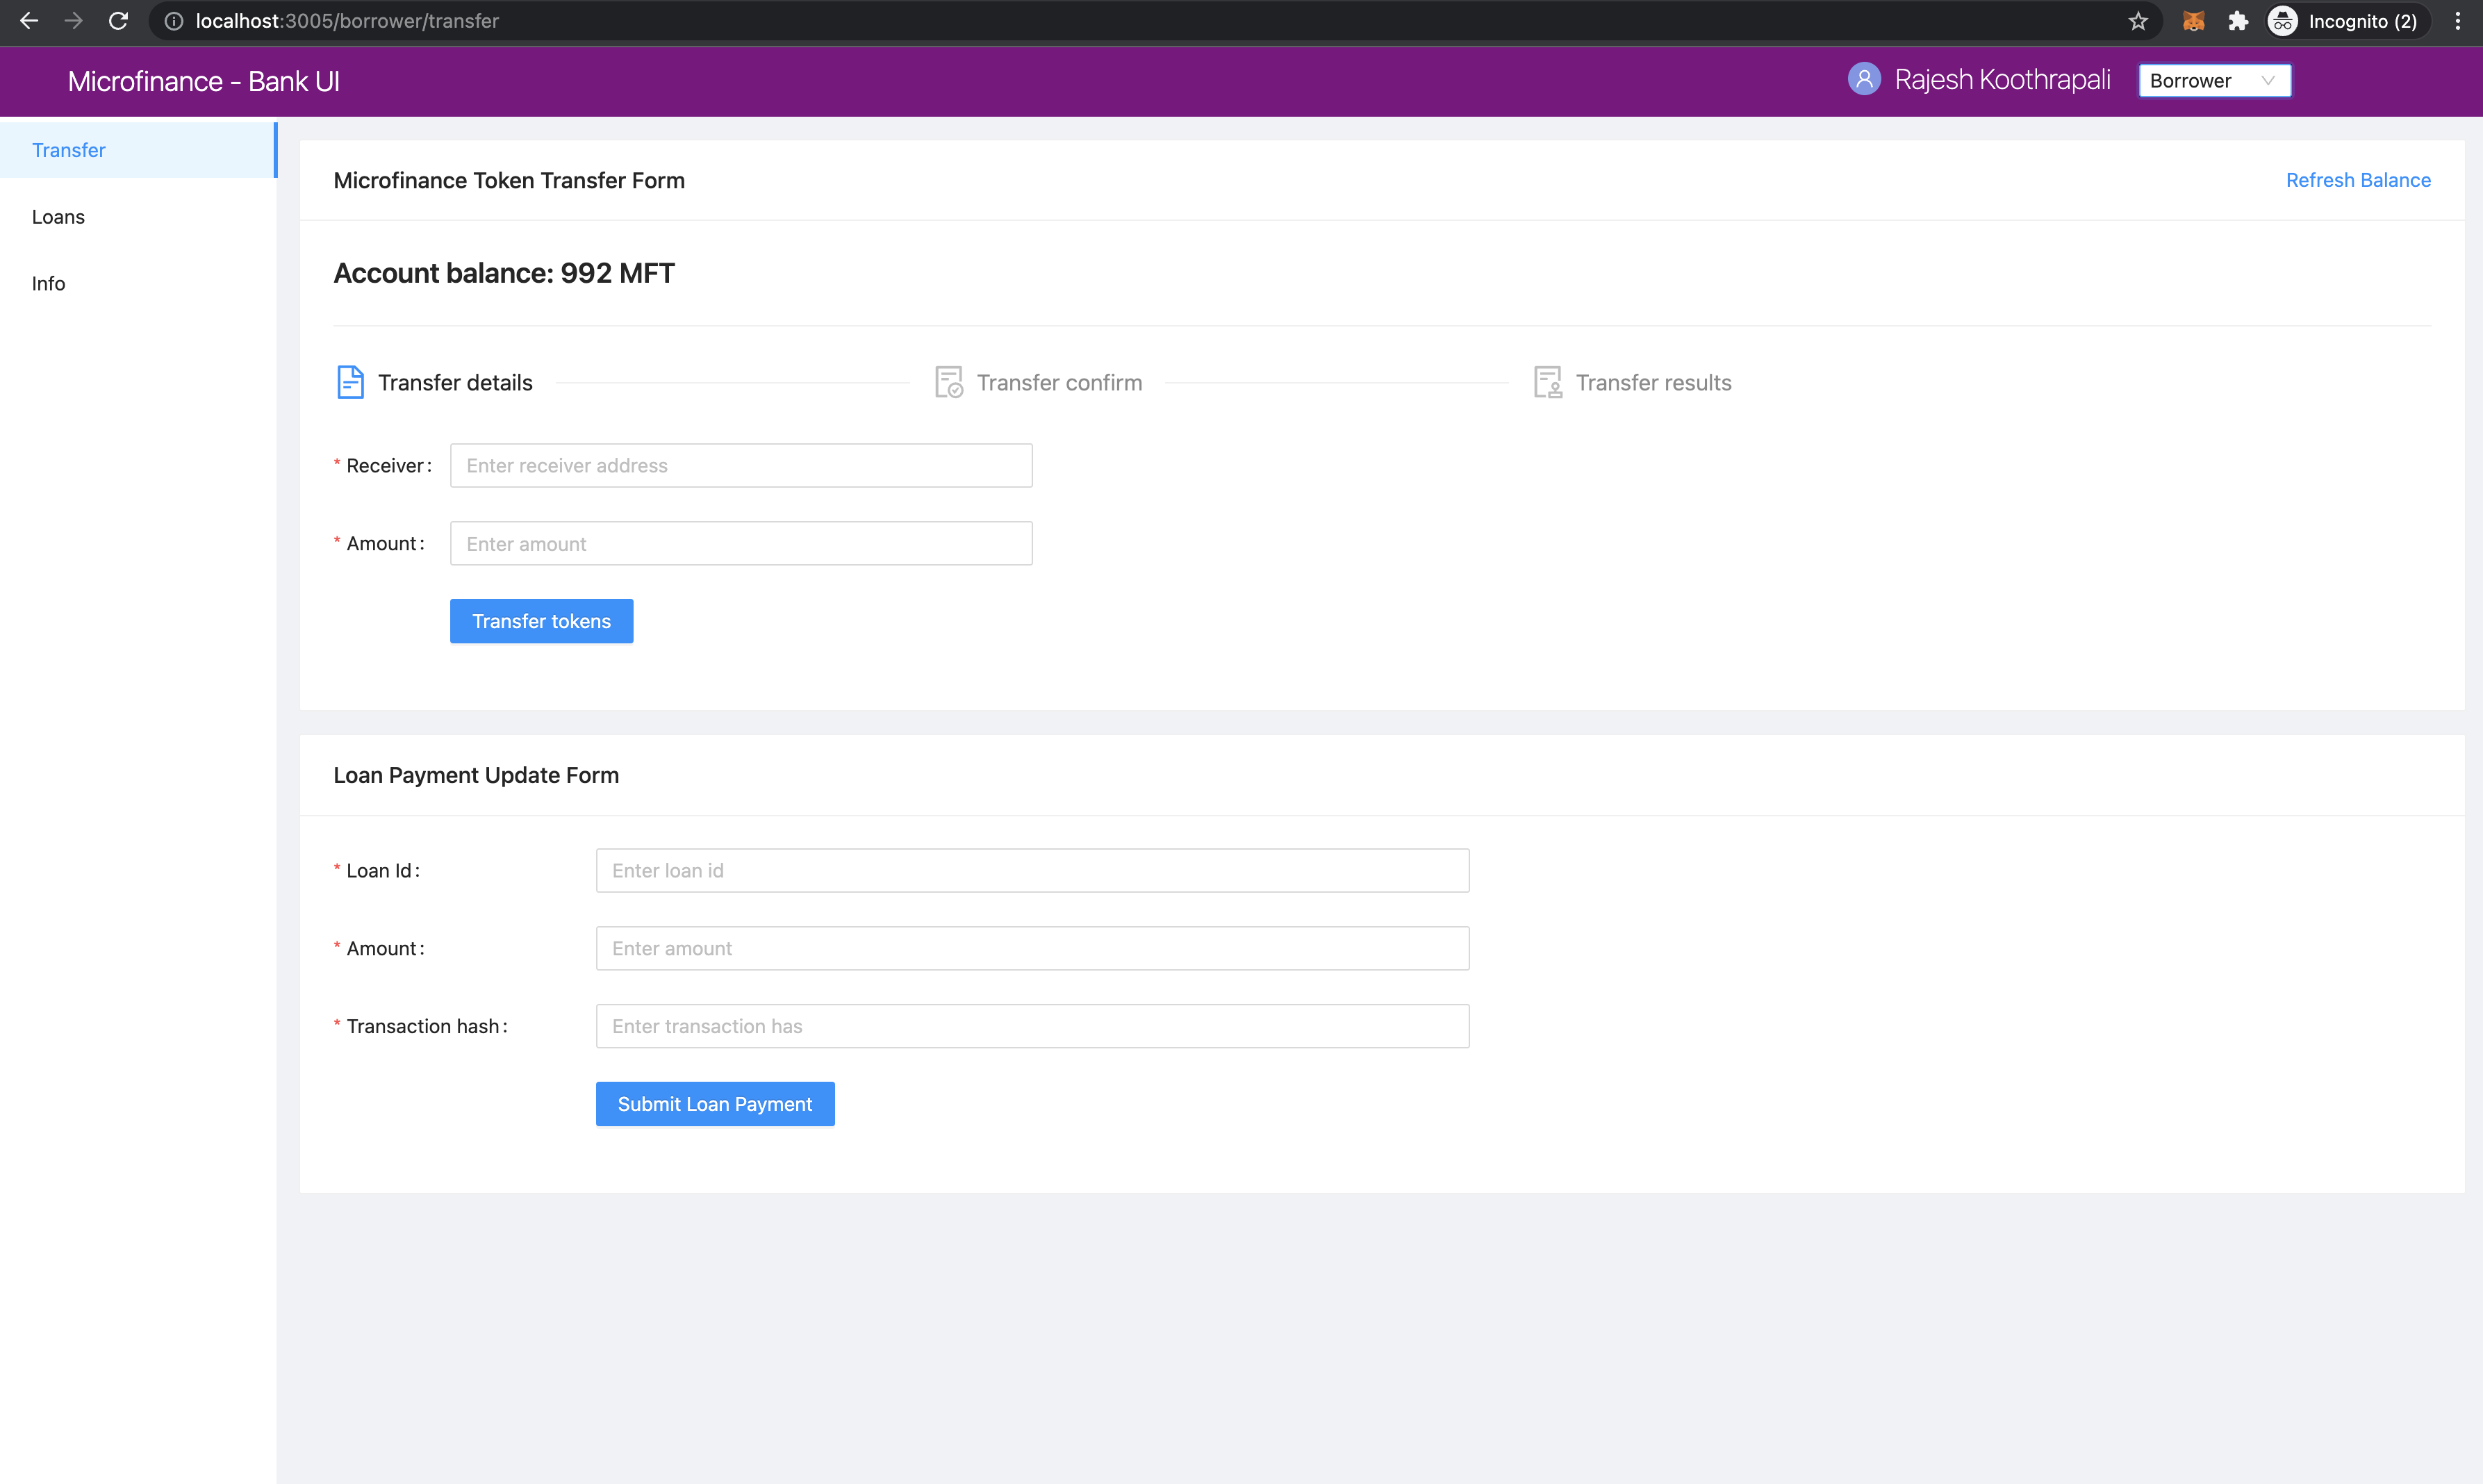
The above screenshot displays the Transfer page of the Borrower view.
The left panel has the Transfer menu item selected.
The browser address bar shows localhost:3005/borrower/transfer.
This means the Transfer menu item has loaded the script in pages/borrower/transfer.js.
The transfer.js script loads the Microfinance Token Transfer Form and Loan Payment Update Form and renders them on the right-side content area.
Bank user’s view:
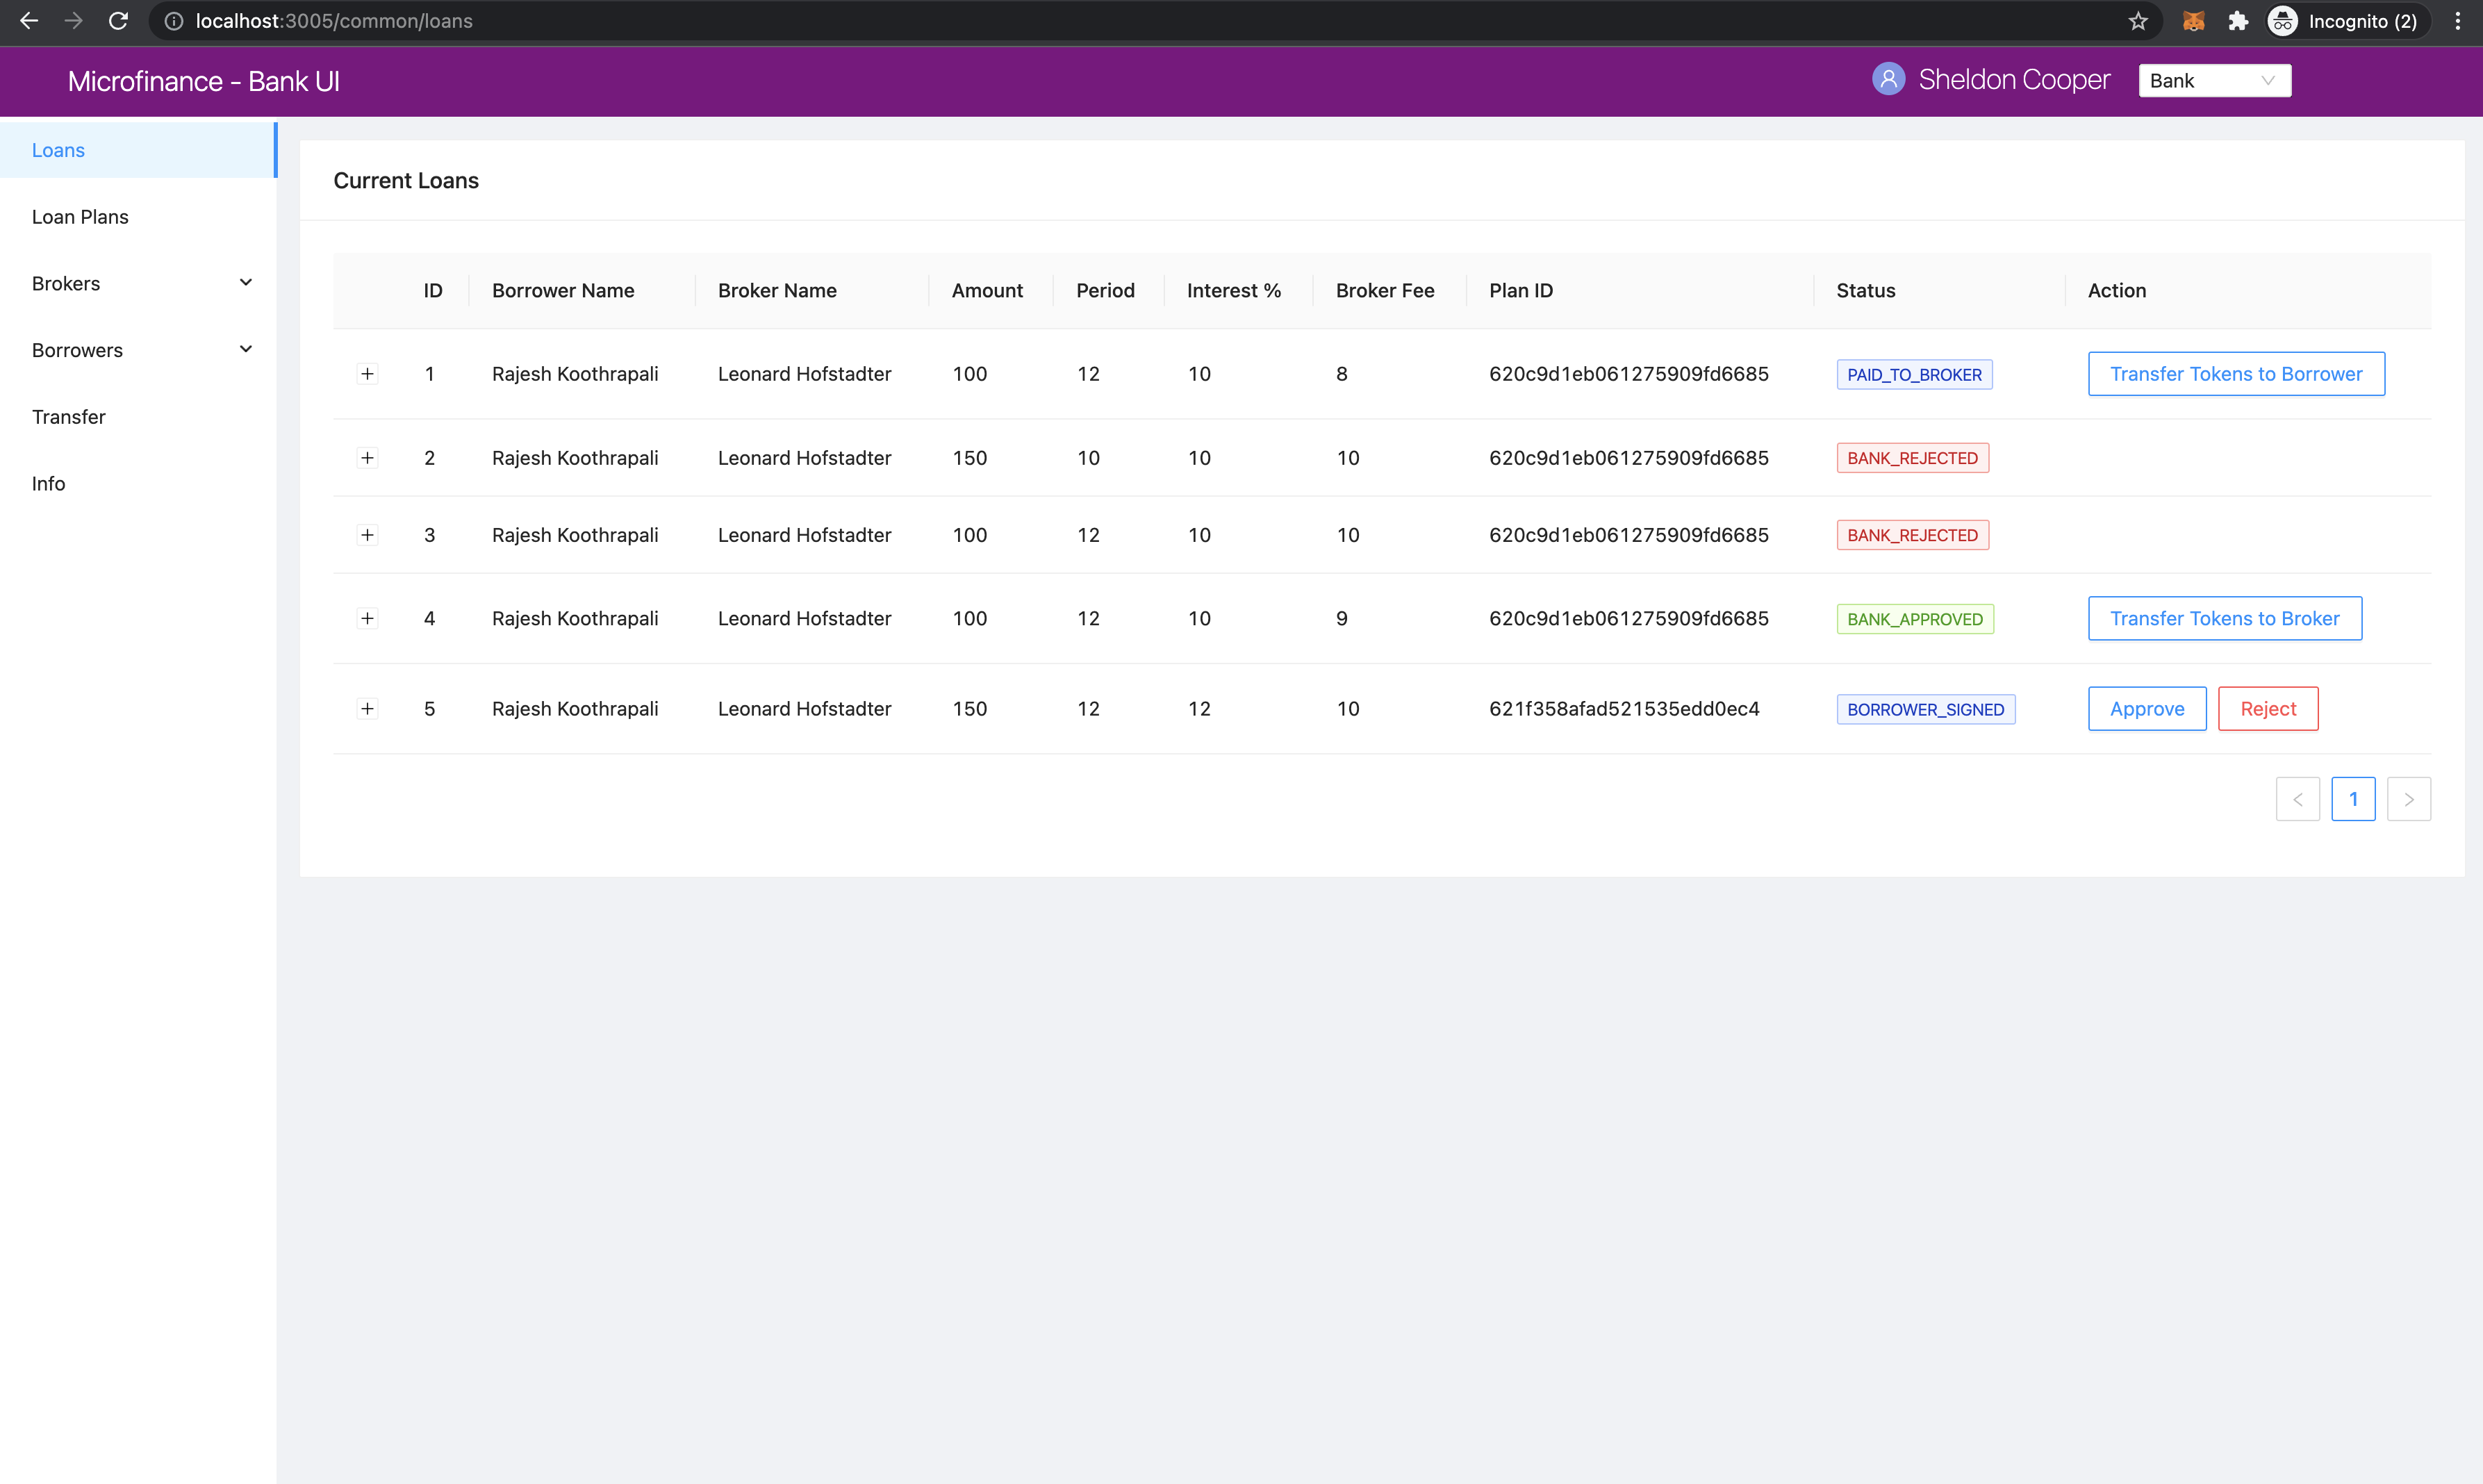
The address bar shows localhost:3005/common/loans.
This loads the script in pages/common/loans.js in the browser.
This script displays the Current Loans table on the right-side content area.
- We will discuss more about:
How to persist the layout across the UI and
How to load pages according to routes displayed in the browser’s address bar using Next.js
_appcomponent andBasicLayoutcomponent inlevel2documentation.